HTC Vive Tutorial
HTC Vive Setup & Demo
Hardware Requirements:
- HTC Vive Headset
- USB/HDMI/Power Hub
- HDMI Cord
- USB to USB Cord
- Power Adapter
Hardware Setup:
- Plug in HTC Vive Cords into the side of the hub that doesn’t have the Power port.
- Plug the Power Adapter into a power outlet
- Plug in the HDMI cord onto the other side of the hub and the other end of the HDMI cord into a GPU port.
- Take the USB-to-USB cord and plug one side into the hub, and the other into a USB port on the motherboard (back of PC).
Unreal (UE4) Setup:
- In order for any VR related software to work, ‘SteamVR’ has to be installed. Make if it’s not, go to Steam and install it via the ‘Tools’ bar under your Library. https://assetstore.unity.com/packages/tools/integration/steamvr-plugin-32647
- Make sure that VIVE is installed. If not, go to https://www.vive.com/eu/setup/vive/ and login via steam, facebook or by your own account.
- Open “Epic Games Launcher”; if not installed go here to install it: https://www.epicgames.com/unrealtournament/download
- Sign in or make an account and go to the “Unreal Engine” tab.
- Make sure 4.16 or above version of Unreal Engine is installed. It’s approximately 6.3gb to install.
- Open Unreal Engine then go to the “New Project Tab”
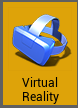
- Scroll down and Click on “Virtual Reality”
- Name the project whatever you like, preferably “starterVR” for starters.
- Click on ‘File’ then click ‘Open Level’, then ‘Virtual Reality BP’ folder.

Then go into ‘Maps’ and choose ‘Motion Controller Map’.
To launch your current level, click on launch at the top right. Your program will now compile, and you can enjoy your VR Level!
If you have any difficulties, go to: https://www.youtube.com/watch? v=1PTTuZ_F8Nk&t=279s and watch the video
Unity Setup:
-
Open Unity
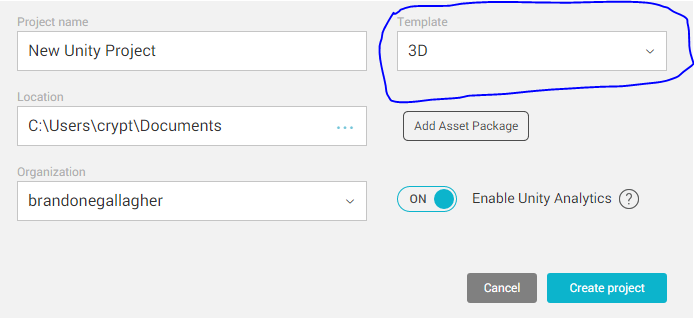
- Create a new project, and make sure it’s a 3D project.
- To make the project VR supported, go to File → Build Settings → Player Settings and scroll to the bottom where it says ‘XR Settings’ and enable ‘Virtual Reality Supported.
- To create a plane where the user will be “standing” on, click on create → 3D object → Plane
- Click on the Plane in the objects menu on the Left and you can scale your plane to be as far as you want using the ‘X’ and ‘Z’ coordinates.
- To test out grabbing an object, there’s a script that can be used to grab an object. The link is here https://outatime.uber.space/HandGrabbing.cs
- To have hands in the game, you can use Spheres as your hands. Make the spheres as large or small as you want using the XYZ scaling tools. Remove the collision by going into the tools and clicking on the gear
icon above ‘Sphere Collider’ and removing the component. This avoids issues when your hands are together.
- Click Edit → Project Settings → Input and duplicate ‘Horizontal’ twice. Call one TriggerLeft and the other TriggerRight.
- Change the type
to JoyStick axis then → Axis to 11th for TriggerLeft and 12th for TriggerRight
- Highlight both LeftHand and RightHand and drag the script over below ‘Add Component’. This script applies to both spheres now.
- Change LeftHand’s node type to Left Hand and RightHand’s node type to Right Hand as well as changing their input names to TriggerLeft and TriggerRight.
- Change the cube or whatever shape you’re trying to grab’s tag to ‘Grab’. If not created, create a new tag named ‘Grab’ and set it to that.
- You can throw your object now!